Hey there, art enthusiast! Are you ready to dive into the magical world of drawing a Christmas tree? If you're looking to learn how to draw a Christmas tree, you're in the right place. This step-by-step guide will walk you through the process, from sketching the basic shape to adding intricate details. Whether you're an amateur artist or just looking to unleash your inner creativity, this guide has got you covered. So, grab your pencils and let's get started!
Drawing a Christmas tree might seem like a daunting task, but trust me, it's easier than you think. With a bit of patience and practice, you'll be creating stunning Christmas trees in no time. This guide is designed to cater to all skill levels, so don't worry if you're a complete beginner. We'll take it slow and steady, ensuring you grasp every concept along the way.
Before we jump into the nitty-gritty of drawing, let's talk about why this skill is worth learning. Christmas trees are iconic symbols of the holiday season, and being able to draw one can add a personal touch to your holiday cards, decorations, and even gifts. Plus, it's just plain fun! So, without further ado, let's explore how to draw a Christmas tree like a pro.
Read also:New Vega Moviecom Trailer Mustsee
Table of Contents
Read also:Download Latest Kannada Ui Movies Movierulz Alternatives
Step 5: Finalizing the Details
Tools You Need to Get Started
Alright, first things first. You don't need a fancy art kit to start drawing a Christmas tree. In fact, you probably already have most of the tools you need at home. Here's a quick list to get you prepped:
- Pencils (HB, 2B, and 4B for varying shades)
- An eraser (a soft one to avoid damaging your paper)
- A fine-tip pen or marker (optional, for outlining)
- Colored pencils, markers, or crayons (if you want to add color)
- A ruler (optional, for straight lines)
- Good-quality drawing paper
These tools will help you create a clean and polished drawing. Don't worry if you don't have everything on this list; you can always improvise with what you have!
Understanding the Basics of Drawing a Christmas Tree
Before we dive into the actual drawing process, let's talk about the basics. A Christmas tree typically has a triangular shape, with layers of branches that get smaller as they go up. The trunk is usually a simple rectangle or cylinder, but you can get creative with it. Understanding these basic shapes will make the drawing process much easier.
What Makes a Good Christmas Tree Drawing?
A good Christmas tree drawing should capture the essence of the holiday season. This means paying attention to details like the texture of the branches, the placement of ornaments, and the overall symmetry of the tree. It's also important to consider the perspective—will your tree be viewed from the front, side, or at an angle? These factors will influence how you draw your tree.
Step 1: Sketching the Outline
Now that you have your tools ready, let's start with the outline. Begin by drawing a large triangle in the center of your paper. This will serve as the basic shape of your Christmas tree. Don't worry about making it perfect; you can always refine it later. If you're feeling adventurous, try sketching a slightly curved or asymmetrical triangle to give your tree a more natural look.
Pro tip: Use light strokes when sketching the outline. This will make it easier to erase any mistakes or adjust the shape as needed.
Step 2: Adding the Trunk
Once you're happy with the outline, it's time to add the trunk. Draw a vertical rectangle at the bottom of the triangle. The trunk should be slightly wider at the base and taper off as it goes up. You can also add a few grooves or lines to give it a more realistic texture.
Fun fact: Did you know that Christmas trees are traditionally made from evergreen trees like pine or fir? These trees have strong trunks that support their heavy branches, even when they're adorned with ornaments and lights.
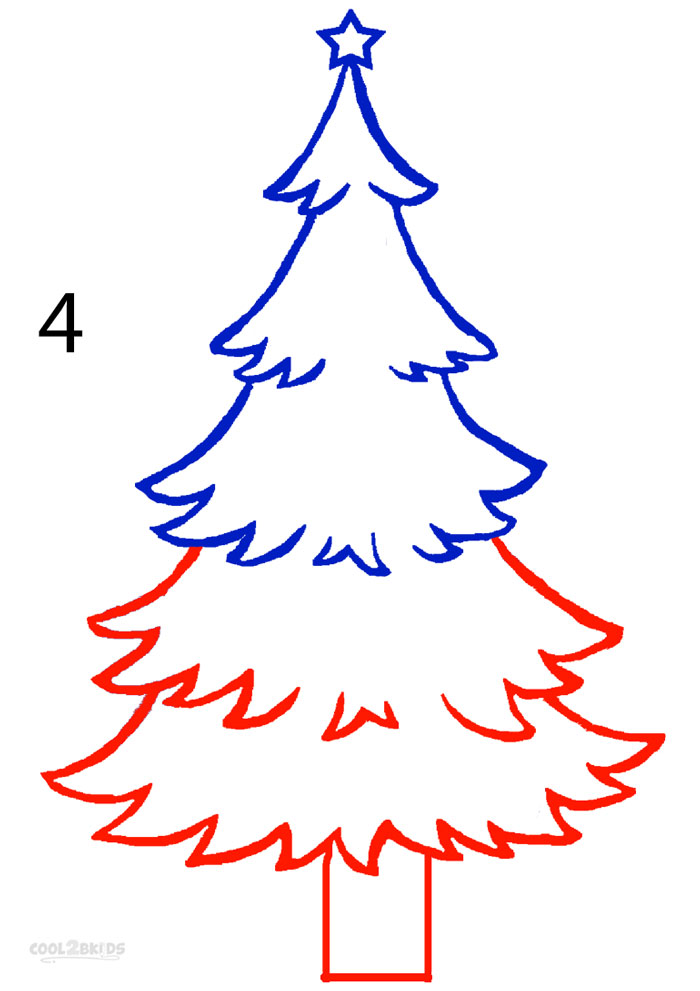
Step 3: Creating Layers
Now it's time to add some depth to your tree. Divide the triangle into sections, with each section representing a layer of branches. Start from the bottom and work your way up, making each layer slightly smaller than the one below it. This will give your tree a more realistic, three-dimensional look.
To make the layers more distinct, you can add small "V" shapes along the edges to represent individual branches. Don't be afraid to get creative with the placement and size of these shapes. Remember, no two trees are exactly alike!
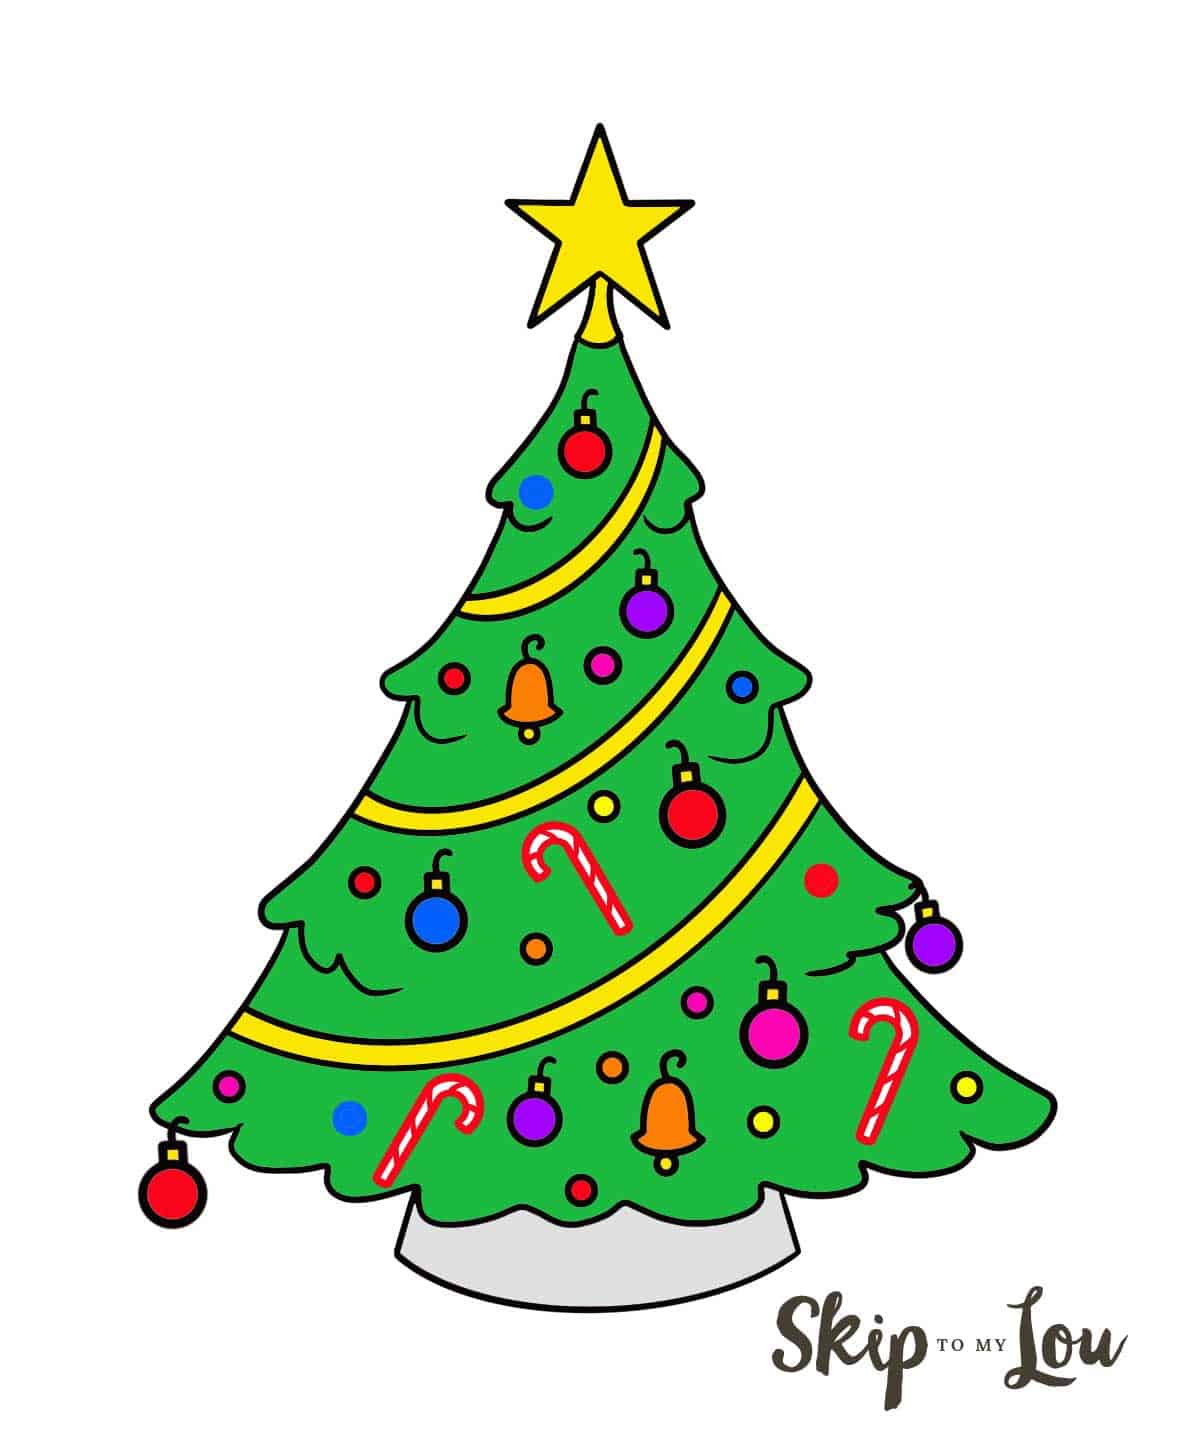
Step 4: Adding Decorations
What's a Christmas tree without decorations? This is where the fun really begins! Start by adding a star or angel at the top of the tree. Then, sprinkle some ornaments along the branches. You can use simple shapes like circles, stars, and hearts, or get fancy with detailed designs.
Don't forget to add some lights! Draw small dots or dashes along the branches to represent the twinkling lights. If you're using colored pencils or markers, you can add a pop of color to make your tree really shine.
How to Make Your Decorations Stand Out
To make your decorations pop, try using contrasting colors. For example, if your tree is green, use red, gold, or silver for the ornaments. You can also add shading to create a sense of depth and dimension. Just remember to keep it balanced—too many decorations can make your tree look cluttered.
Step 5: Finalizing the Details
Now that you've added all the major elements, it's time to finalize the details. Go over your drawing with a fine-tip pen or marker to create clean, bold lines. This will make your tree stand out and give it a professional look. Once you're done, erase any remaining pencil marks to reveal your masterpiece.
For an extra touch, you can add a shadow underneath the tree to give it a grounded appearance. You can also draw a few presents at the base of the tree to complete the holiday scene.
Tips and Tricks for Drawing a Christmas Tree
Here are a few tips to help you take your Christmas tree drawing to the next level:
- Start with a light sketch and gradually build up the details.
- Use reference images to get inspiration for different styles and designs.
- Experiment with different textures and patterns to make your tree unique.
- Don't be afraid to make mistakes—they're all part of the learning process!
Remember, the key to great art is practice. The more you draw, the better you'll get. So, keep honing your skills and soon you'll be creating Christmas trees that look like they came straight out of a holiday movie.
Different Drawing Styles to Explore
One of the great things about drawing is that there are so many styles to explore. Here are a few popular styles you can try when drawing a Christmas tree:
Realistic Style
This style focuses on creating a lifelike representation of a Christmas tree. Pay attention to details like the texture of the branches, the placement of ornaments, and the overall symmetry of the tree.
Cartoon Style
If you're looking for something more playful, try drawing a cartoon-style Christmas tree. Use exaggerated shapes and bright colors to make your tree fun and whimsical.
Minimalist Style
For a modern twist, try creating a minimalist Christmas tree. Use simple shapes and limited colors to convey the essence of the tree without overwhelming the viewer.
Practice Makes Perfect
As with any skill, practice is key to improving your drawing abilities. Set aside some time each day to practice drawing Christmas trees in different styles and sizes. You can also challenge yourself by trying new techniques or incorporating different elements into your drawings.
Remember, the goal is to have fun and express your creativity. So, don't stress too much about making everything perfect. After all, art is about self-expression, and there's no right or wrong way to do it.
Conclusion: How to Draw a Christmas Tree Like a Pro
And there you have it—a step-by-step guide on how to draw a Christmas tree! By following these simple steps, you can create stunning Christmas tree drawings that capture the magic of the holiday season. Whether you're drawing for fun or as a gift, your creations are sure to bring joy to those around you.
So, what are you waiting for? Grab your pencils and start drawing! And don't forget to share your creations with us in the comments below. We'd love to see what you come up with. Happy drawing, and merry Christmas!